Tuesday, November 03, 2015

A Reveal


 For some reason, I don't seem to be able to resist a challenge. When the challenge involves some of my favorite things, well, it's really irresistible. So when Canton Village Quiltworks announced their Charms and Cherrywood contest, well, it was calling to me! Use Cherrywood fabrics and two of Judy Niemeyer's Charm Elements and combine them in a quilt.

So I sorta-planned my quilt and cut out and prepped my pieces on a weekend retreat at Big Bear. (I know, I know, should have blogged about it at the time. But I was too focused on prepping patterns!) 

That was back in August. Deadline for submission of pictures was Nov. 1. My personal challenge was to be able to submit a picture of a finished quilt by the deadline.
Closeup with loose threads!
 I will end the suspense right now. I did make the deadline. Well, there were a few hiccups along the way, but I got it done.

 I should add that I have no delusions of excellence and not a hope in hell of winning the contest. I know all the flaws in my piecing and quilting and while I'm going to resist pointing them out here, let's just say I can see them all. But I did meet my personal challenge goals. I finished the quilt, and I submitted pictures. And, I enjoyed the process.

 So in my own rather limited view, I am a winner on this one. I'm a little embarrassed to have the judges looking at my work, but that was also part of the challenge!
Not quite as close up! Some quilting details
Really,  I'm rather fond of this piece.  I've never worked with Cherrywood fabrics before--they are hand-dyed in small batches and have the look and feel of suede. So learning to handle them was the first part of the challenge. They are heavier than "regular" cottons and the texture is a bit rougher, so they don't iron to the smoothness of a batik or cotton.

 The two elements--the sunburst and the spiky bits--had to be left intact, no resizing or chopping up. So that was another challenge, to fit them together so they didn't look too jarring. Drawing schematics on graph paper gave me some ideas, but really I had to have the units made before I could lay them out and see how they really looked. 

I had taken the completed units with me when my friend and I traveled up to Santa Clara for PIQF, because I had to get all the paper off the back before I could start sewing them together. Laid them out on the hotel bed and... 
I was short one unit. One 6" x 12" piece. I'd used up all my fabric, too, though I had plenty of papers left. So, the next morning, before leaving Santa Clara, we went back to the exhibit hall and I found the Cherrywood booth. And bought another set of fabrics, in colors that kind of went with what I already had. I was able to make enough more blocks to expand the quilt--because I wanted the "new" colors to blend across the whole piece and not just look like one afterthought block tacked on at the end.

, So here it is. Now, I do have a confession to make.
Full view
 In order to get this finished picture, I had to pin the binding in place most of the way around. That's why the edges ripple a little--it's the straight pins on the back.I've since finished sewing one side of the binding (it's devilishly hard because of the heavy stitiching where all those points meet) and it lays flat.  So... my first finish for November!

Saturday, August 22, 2015

Dog Days and Doldrums

August really has never been my favorite month, but this year it might be a little different. For one thing, I actually live in a house with decent a/c, so keeping comfortable hasn't been the huge problem it was in the past. Not that it's been a record-breaking August, just one more in a drought-stricken state. 

We did have a heat wave, but during the worst of it, this is what I was doing:

 "Camping" at the beach with my daughter, her husband, and their two girls. Oh, and Trooper.

He's such a cutie! And really a very good dog. Likes to hang out with his grandma and snuggle into the quilt she's trying to bind.

Hey, it already has lots of cat hair on it, why not a little puppy love too?
     Just look at that face...

I must say camping has come a long long way from the earlier days! They have a trailer with all the mod cons and even dry camping with no hookups was very easy. Of course, as Elderly Honored Guest I really didn't have much to do except entertain the dog and enjoy the kids.

Then I came home, did a little laundry, petted the cat--she didn't seem to think I smelled like Dog, so that was a good thing--and then back to the ever-present binding project.

 
Which racked me up another UFO finished this month! This is the one I called Plum Pinwheels, and which was languishing in my "to be quilted" bin for a very long time. It was one I decided to send off to the longarmers' because, well, because otherwise it would have continued to sit there, unquilted and unloved.

Closeup of how they did, with a peek at the back. You can almost, if you look really hard, see that there are two fabrics in those pinwheels. I made this back in the days when I didn't step back far enough to check that there was enough contrast, so the pinwheels aren't as crisp as they might otherwise be.

Too bad. I like the way it came out and the way the other fabrics pick up on the tones in the print.


We had the last day of Camp Grandma and the girls got a good rummage in some of the fabric. They loved the flannel print and wanted it spread out so they could enjoy it. Then they got the red-rose swirly minkee and the black sherpa (I'm going to make at least two throws out of them, with the red on one side and the black sherpa on the other) and made themselves "nests" to snuggle into and play Metamorphabet. Thank goodness for apps that work on the phone and the iPad both! Sneak in a little reading practice and letter recognition while they're having fun.
   Later on, the nests got expanded by using every pillow from my bed, the sofa, and every throw and small quilt they could find. I couldn't get a good pic of that--nowhere in the room to stand.

And yes, all those plastic tubs are holding fabric or projects of some sort. Or supplies--the ones on the far right are all boxes of spools of various kinds of thread. I thought I didn't have to buy thread again, ever, until suddenly I needed black thread--and had none. Black glittery, sure. Shiny black. But no plain old workhorse black. Luckily I work in a quilt shop...

So on a quiet evening at the end of hectic week, I was able to sit in my comfy chair with my comfy cat-buddy and sew a little more binding--this is the Cats All Year quilt, and like a couple of others, it needs to be quilted. But I decided at one point that I'd feel better if I put the binding on all three of them and then finished the quilting.
Look at that sweet little fuzzy head!

One more week of August, although for my crew, summer vacation is over. The grandgirls go back on Monday and the little grandboys have already been back for two weeks. Oldest Denver granddaughter is off to college--Colorado State for my vet-to-be.

Friday, July 31, 2015

July Wrap Up

I guess July has been a little more productive than I have been feeling! These hot lazy days, with my major effort directed to keeping a little more comfortable than sweaty-sticky, leave me thinking that I'm not getting anything done. However, in addition to keeping myself clean, fed, and somewhat orderly, I've been able to sew.

This is a new project--of course. The Quiltville group on Facebook (there's a link to my FB page over there on the sidebar) is doing a year-long challenge with their leaders & enders making Tumbler quilts. You may remember my adventures with tumblers over the last couple of years; it was so much fun making that quilt (later two quilts) that I mentioned to Anne that I wanted to do it again. She agreed, we ordered templates, and as soon as they arrived we started cutting. 

I managed to get 600 cut out of 4 different fabric lines I just happened to have fat quarters of; she used 30x prints. She made 5" tall tumblers; mine are 3". I sewed them all into pairs and then realized... I need 600 PAIRS of tumblers. So here's the next 600 cut. 

I enjoy the cutting so it's not a chore at all. What amuses me is that the Color Council has done its work well--the four fabric lines, from three different manufacturers, all use basically the same colors: orange, teal, navy, and gold.

My little furry friend has been coming out of her shell recently and has decided to take over the job of quilt supervisor. She's not quite clear on the concept, though.

This is another project, sort of an amuse-bouche if you will. The Big Bear Quilt Guild, of which Anne and Sandy are members, has set themselves a challenge goal of 100 pillowcases and 100 baby quilts by Christmas, to be donated to a local charity.

Of course I have to help out... So some baby ragg quilts are in the pipeline. Great sewing for a hot day, and a good excuse to get out the Brother and vroom-vroom a little.

This machine is a lot like my mother's industrial machine--straight stitch only, knee lift, winds the bobbin while you're sewing, no bells or whistles, just fast efficient stitching.
Giant stack of batting squares. Used them all up! Not to worry, found more batting, was given some scraps, so this is all basically "free" since it was leftover from other projects!


Community Quilt top is done and ready to go to the longarmers. This is it spread out on my queen bed--so it will be a good twin size when it's done. I'm really happy with it, but I think the next time I would make it one row across shorter. Not changing it now though!

And then there are the completed quilts. This is where it starts to get really impressive, at least to me! 
First up, Picasso's Puzzle. This is the quilt that was a little box of triangles, which I put together one week on a whim. Sent it to the longarmers with a batch of other tops that I'd made but not quilted.

The backing of this quilt is lime green with bubbles on it, and there are lots of circles in the Picasso print. Hence lots of "bubbles" in the quilting.
Woven Ribbons. Finished sewing the binding on this one down at the beach when my daughter and her family were here.


Ditto with the Shadow Study I quilt. I had wanted to quilt both of these myself originally, but decided that it would be better to have them done, so longarming it was! I'm pretty happy with the way they turned out.
And what could be better than sitting on a deck at the beach with a little hand sewing?

Otherwise, I sew binding while I'm watching TV. I got the Hunter's Star Christmas quilt done--after all, Audrey decided she loves it and really wants t o take it home! What's a grandma to do?

And... I just realized... I also finished up the tile quilt, and it's gone to its new home and the spot it was designed for. I'll have to see if I can add a picture of it here!

Thursday, July 02, 2015

Beach Interlude

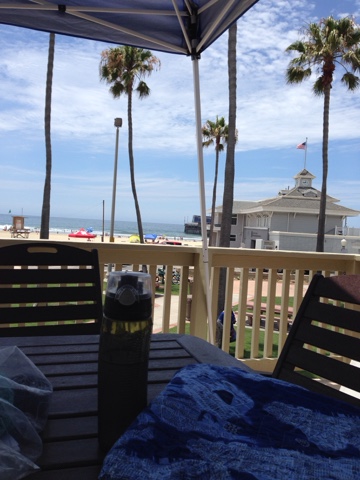
So my Denver family is in town for a week, and they've rented a small place at the beach. It's got all the amenities though--a deck with a great view, indoor plumbing and a kitchen! It's on the second floor and the stairs are a little narrow and steep but it's worth the effort (even with my gimpy knees and healing back) to climb them.

The sunsets have been spectacular this week. There was even a double rainbow on Sunday night, but the phone camera couldn't capture the vivid colors. *This is not a picture of the rainbow!

Finished the binding on this quilt.


Sewing binding and knitting are lots more relaxing when you have a view of the ocean. When it's shady on the deck, it's even better!

Good night!

Saturday, June 27, 2015

UFO Update

Short report (at least that's the current plan!) on the state of the UFOs. I'd like to say the pile is dwindiling, but some days it doesn't feel that way. This is turning into The Year of Finishing Stuff. Not too bad a goal!

So here's a status update--the sidebar has been updated too. First one in progress is the tile quilt that's destined for my daughter's wall. As I write this, I've got one side and part of two others done--I'm sewing down the binding. My TV-watching twitch!


What's more boring than pictures of binding being sewn on?

Maybe a picture of quilting in progress??

At least I do have something finished to show you! This is the 2014 Quiltville Mystery Quilt, aka Grand Illusion. I guess I can say that this one never quite got out of WIP status though, because it was begun in November over Thanksgiving weekend. So having it done by the summer solstice isn't too bad.
Finished!

Now if you'll excuse me, I have a pile o' pillowcases to work on this weekend. I'm looking forward to getting them done and on their way!

Pinwheel Project Completed!

It's been a long time coming--but the quest for a Pinwheel Star quilt of my own has come to a satisfactory conclusion!

If you've been following this saga, you will already know the story, and can now skip to the end, sort of.

If you don't know the story, here goes. Several years ago, a couple of my friends *Sandy and Louise, to be exact* made this quilt in a class at Bearly Stitchin'. Sadly, I don't remember who taught the class, except that it wasn't me, and I wasn't in a position to be able to take it, or tackle the quilt.

That didn't stop me from wanting one, of course. So fast forward a few years later, and I found a picture of Sandy's quilt and posted it to Facebook with a comment that I wanted to make one. Didn't have the pattern, but when has that ever stopped me from doing something?

Noodled around with graph paper and pencil and decided that a 10" block would be the right size. And I know how to make HSTs and even QSTs, so I rounded up my stash of 30s fabrics and cut a bunch of squares.


Have I mentioned that math is not my best talent? Well, it's not. I figured out that 50 blocks would make the right size quilt, and cut out a couple of hundred squares and started piecing. Once I had pieced all thoseHSTs (half-square triangles) I cut out a whole lot more squares and started putting them togeher to make those hybrid squares.tate
 Then I ran out of squares and still had a whole lot of HSTs to go. Oh yeah--I forgot that each set of fabrics made two HSTs and I'd need twice as many squares. This kind of thinking led me to finally doing a count and realizing that I had a whole lot more than I needed to make one quilt. Oh well. 

At this point I had to pack everything up so I could sell the family manse and move myself and the cats to a smaller but more convenient (as in one-story) place. Marinating in the process didn't improve things much. 

But finally I got busy and realized that I was very close to having enough blocks to make not just one or two, but actually SIX of these things. I suppose the wise thing to do at that point would have been to say oh well, extra blocks, and make my quilt. Nope. More fabric turned up in the garage (funny how that happens!) and I did a whole lot more cutting (sashings and conerstones) and sewing, getting the tops pieced one at a time.

Very long story short, I was finally able to send them all off to be longarm quilted (the state of my spine doesn't allow me to wrestle with this big a quilt myself), they came home, I put bindings on them and as they were finished they were distributed to various of my kids who'd expressed an interest. Plus one for me! 

Giant sigh of relief every time I see this quilt on my bed! The cat definitely approves, too!

Saturday, May 16, 2015

Rounding Them Up

Sometimes, things begin to snowball, and all you can do is hang on for the ride. That seems to be the theme with my UFO collection this month. I've suddenly been inspired to dig in and get them rounded up and on the road to FOs!

To back up just a bit, I've had a couple of tubs in the very back corner of my sewing area that got moved in there after I started settling down. One of them was full of batting, mostly leftovers from other projects and one big roll of something I'm not too crazy about. The other was mostly finished tops that just need quilting, and they--plus a couple of containers of pins and some batting--had been packed up to take to my ill-fated class on machine quilting at Asilomar. Really through no fault of the instructor's, it turned out to be not what I'd been told to expect, and secondly was thoroughly monopolized by a rather loud, rude, and clueless person who seemed to think it was all about her.  One good thing about it was that I was able to finally unpack my Brother 1500S and get acquainted with it.

Anyway, the tub came home, and what with one thing and another (like a couple of back surgeries), it stayed packed up. These were all quilts that for different reasons I wanted to quilt myself. 

Well, the stars seemed to align in such a way that I needed to go through that tub and make some choices. Herewith some of the results of a very productive Monday! (And thanks, Anne, for the encouragement!)
Batik "Magic Squares"
The batik Magic Squares are from a class with Sylvia Einstein at Asilomar--2010, I think, same year as the quilting class. It's mostly batiks with a few standard wovens in there. It's small and offers a lot of good prints that will lend themselves to free motion quilting. It's also busy enough so that any mistakes won't show too badly. 

Yes, my quilting is very rusty. Except for sewing on bindings and a couple of very small bits of walking-foot quilting, I could say I have barely touched the machine since that class. 

The Mariner's Compass was made in a class with Judy Mathieson--the last class she taught at Asilomar before she retired. She teaches a method of paper piecing that uses freezer paper templates that aren't sewn into the fabric. It was the first time I was able to actually paper piece!
Mariner's Compass #1

I love this quilt. Another small one and with lots of possibilities for the quilting. I think the batiks look very "watery" and the background fabric is a whimsical nautical print. (I also need to take out all the pins I put in, because the back decided to wrinkle and pucker. Wish I'd found that before I closed the pins. I always teach people to check the back before closing the pins...)
 
Cats for All Seasons and All Reasons

Ready for mailing away!
The cat quilt turned up in another box. I did manage to get all the appliques sewn down before I moved--buttonhole stitch with invisible thread. This one should be fun to quilt and even more fun to embellish. Buttons or beads for cats' eyes? Tulle or eyelet for the ballerina's skirt? 

There are two more quilts waiting to be pinned, one from the box and the other is my Jumping Jax Flash quilt, which you've seen on the blog before. 

Then there were five more tops in the box which, for various reasons, I decided I might just as well have longarmed. Boxed them up and sent them off! The top one on the stack is the Colorado Log Cabin, which wasn't a "tub quilt" but the rest of them are. I will say that part of the inspiration for doing this is that Anne was wearing her Stashbuster's tee, which reads "done is better than perfect." A mantra also espoused by Brenda Papadakis in our Dear Jane class. 

Lurking
Here's the rocker that sits next to my sewing area. In it are stacked a couple of quilts that need to be layered, two quillows which have since been stitched together and are now waiting to have the batting sewn to them (it's pinned in), and my Grand Illusion formerly-mystery quilt, which just needs the binding sewn down. 

Who knows, one of these days I may make it to the bottom of the pile and be able to use the rocker to--gasp!--sit in! 

Wednesday, May 13, 2015

Colorado Log Cabin

Sometimes, you just have to wonder how and why certain projects got set aside at a specific point. At least, I do! This project is one of them.  I mean, look at this:

It's a complete top. In the box also was a 4-square block and a good chunk of the green fabric. Not so much of the red, and almost 3 yards of the light print. Hmm...

This was in the box
Here's the box... 
The box and its contents
 
So once I put my mind to it, it took only a couple of hours to get it to this point: 

 
  From here, I put a back together and got it bundled up with the request sheet for the longarmers.

After 20 or so years in the box, it's going to be a finished quilt soon. I figured 20 years at a minimum: the book in the box is Trudie Hughes'  More Template Free Quiltmaking and the printing date is 1988, but a couple of the fabrics are from Jinny Beyer's first collection of backgrounds and blenders, which came out in 1990. That was the year that the 100-piece collection was debuted at Quilt Market in Houston, which was the only time I went to Market with my boss from Bearly Stitchin'.  She really liked Trudie's books and methods, and we did a lot with them at the shop. I'm sure this may have been destined to be a shop sample originally, but then things changed direction. (She, my boss, was definitely one to assign the same project to a couple of people and then decide that she wasn't going to feature it after all. She had a real flair for shop decor and for projects that would catch people's imaginations, and I guess the feeling was that this was going to be a little too complicated for her two-day-class format.) 

Anyway, I've had to update the sidebar--this quilt wasn't even on the radar until I brought that box into the house. Not sure what the takeaway is from this...except that I'm going to have a nice Christmassy quilt ! (Unless someone decides to claim it. That's always a possibility!)  

Saturday, May 02, 2015

Picasso's Puzzle Quilt

Here comes another attempt at posting a blog using photos from the camera on my phone. I'm a little more hopeful of good results this time! 

So this is a tale of a small plastic box that has been floating around in my workroom, my garage, outdoors during the Great Renovation Experience of 2008, in storage... and finally into  my newest workroom.  May I present Picasso's Puzzle. 


The story is that back in the early '90s, I had found a pattern for the old style Streak of Lightning quilt, which someone had made up and called Hot Flashes. Well, that's kind of an inspiring name, and I knew just what to use: a new fabric that had come into the shop (the original Bearly Stitchin' on Roosevelt, in Pasadena, before it was expanded) from Hoffman International. They had a line called Pablo's  Puzzle, based on some Picasso-ish squiggles and zigzags and things.
I pulled a group of matching solids--and by the way, these Kona cottons are all still available!. I cut out all the triangles and sashing strips and put them in a box, which I even labeled Hot Flashes Quilt. 

Fast forward to last Monday--20+ years later, after the box had survived many moves and shuffles and threats of being tossed by persons unknown. 
 

Pablo's Puzzle by Hoffman International
These shapes are parallelograms, not trapezoids.

Back view
I was working on the Prismatic Star, having finally figured out the easiest and best way to sew the diagonal pieces together so they had a prayer of matching. (I know that Judy's patterns are precisely engineered and in theory go together like buttah. I am not the most precise sewer, though, so mine need a little fiddling and adjusting to get the diagonals to match.) When I had sewn a fourth set together and put them down on top of the previous three, and discovered that they were all soaking wet since the iron had leaked--well, that was the last straw! 
I needed something quick, easy, and relatively mindless. My eye lit on the Hot Flashes box... and the rest is history. I spent most of Monday sewing triangles to triangles and then into rows, with just a few hiccups along the way. 

Fast forward to today, Saturday, and I finished the piecing--even figured out how to eke out enough extra Pablo to make side borders. So after 20 years of languishing, in less than a week it's a finished top, has been assigned a backing fabric (lime green with white bubbles) and is once again in a box, this time to ship to my faithful longarmers!

 There may be a moral to this story, but if there is, it's eluding me. However, it's another UFO to move up the list. I had to add it to the sidebar, because it was so deep in obscurity it never made it to that special place. I renamed it Picasso's Puzzle, because the old name just didn't fit, and besides, that was the other quilter's name for her quilt. Mine will remind me of visiting the Musee Picasso in Antibes and perhaps inspire me to unearth some more project boxes. Yes, sadly, there are more of them lurking...

Contents of "the box." Talk about a precut kit!

Wednesday, April 29, 2015

Vogue Knitting Live in Pasadena

Doll vest in Twisted Stitch
Finally getting to "finish" this post from my wonderful weekend in Pasadena at Vogue Knitting Live! It was a great experience, and I'm glad to be able to share a few vignettes with you!

I took some stimulating classes, got to see some interesting exhibits and awesome vendors, and met up with friends old and new--all very satisfying!

My first class was Bavarian Twisted Knitting with the incomparable, one and only Franklin Habit.  I know, right??  (Check out the very end of this blog post for a surprise!)

Back of the doll vest
 I was feeling shy about taking too many pictures in class, even though he gave permission for non-flash photography, but I just loved this little doll vest. Do I think I'll make one?

I always think I could make something like this. Time and energy constraints mean I have to be mostly satisfied knowing that I could if I wanted to!

 My sampler from the class. The really amusing part--to me--is that I had no problem learning twisted knitting--and that's because I had spent a lot of years unlearning it!

When I first learned to knit--age 7 or so--this was the way my mother taught me, because it was how she knit. (My mother's knitting is a good topic for another blog post!) I didn't realize that it was "wrong" or different until many years later. I "helped" a friend who was bogged down on one of those endless projects that seem like such a good idea when you cast them on... Anyway, I knit a couple rows for her, and she informed me that she would have to take them out, and pointed out how my stitches all leaned a different way than hers. She showed me what I was doing wrong, and my knitting got a lot better looking.

Anyway, twisted knitting is fascinating to do, the charts are really easy to read, and I think there will be more of it in my life!

The second day was two classes, also with Franklin, on designing tesselating patterns. Sounds fancy, huh?

Well--turns out it's very similar to things I've done with quilting for years! Applying the principles to knitting was fascinating!

I did one sample with knit/purl variations and a second with two colors, the green and white.

Not enough contrast between the colors but the pattern did show up better.
 We were encouraged to play with our own designs, using the principles he showed and explained about how to make sure the patterns truly tesselated.

Of course when I came home I went to my bookshelf and found both Jinny Beyer's and Christine Porter's books on tesselating quilts.
Same principles, different materials, but equally fascinating!

All of which segued nicely into the Sunday morning class, on designing with Fair Isle patterns with Mary Jane Mucklestone.
She had tables full of samples that we could touch and examine and try on and try not to drool over.

 I also learned something that will make stranded knitting much easier for me. Again, back in the dim dark past when I was learning to do colorwork, I picked up some bad habits--or poor info, to be fair--and was making life much harder for myself than it needed to be.

When I think of all the colorwork sweaters (and even long pants) I knitted back in the day, well, I wish I had known then what I know now! Anyway, many thanks to Mary Jane for the lesson!


Of course I came home and checked my bookshelf, and I had some of her books. It was kind of exciting to look at them and realize that I had been handling those samples!


The Mochi Mochi table was fun and for some reason the only display I took pictures of! I think it was because by Saturday evening, my feet hurt and I was tired, and I thought I'd get back on Sunday to do a proper job. Well, I didn't make it back on Sunday, instead I met up with some Ravelry friends for lunch and then hit the freeway for home.  On Friday I was cruising the market with the incomparable Ellen Bloom and that was not conducive to picture taking either!

Technical note: both the iPad and iPhone Blogger apps have been refusing to upload pictures for me, so today's photos came via a chain of emailing them to myself then downloading them to the computer and then uploading here. Pretty cumbersome. At least it worked, and here's my post a couple of weeks later!
I have a new friend!


-